OpenVPN configuration using two-way TLS authentication
The disadvantage of the secret key authentication method is that its theft from one of the participating VPN hosts leads to the necessity of changing this key from all participants. This raises the question of how to transfer the new key through an insecure Internet channel safely. Therefore, if needed to connect several clients to the server, one should choose TLS authentication.
In this case, each party has its own private key, which is not transferred anywhere. Only the client's public key certificate signed by the CA is transmitted. Such certificates are issued for a certain period of time by specialized organizations for money. But for organizing VPN inside your company, if there are no special requirements for security, you can use your own certifying centre.
Now let's consider an example of creating keys and certificates in Windows to connect two clients: Keenetic-2 and Keenetic-3 to the Keenetic-1 server.
To create all necessary keys and certificates, we need a set of EasyRSA scripts from the OpenVPN package version 2.4.6-I602 for Windows, which also uses the openssl utility included in it.
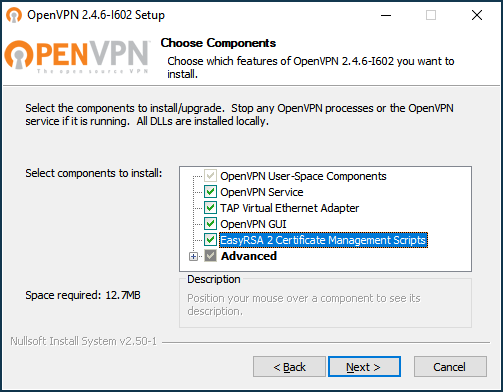
To install EasyRSA, mark the component 'EasyRSA 2 Certificate Management Scripts' when installing OpenVPN:
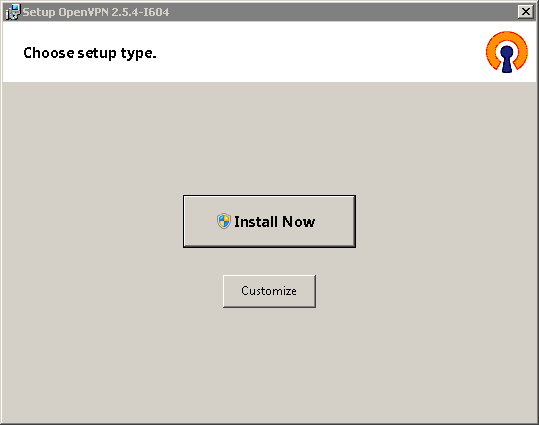
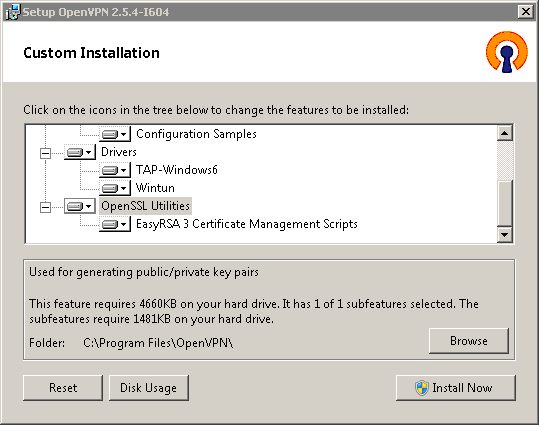
In OpenVPN 2.5.x versions, to install the EasyRSA scripts, press the 'Customize' button on the first installer screen and scroll to the bottom of the component list.
Open the Windows command line as an administrator.
Go to
C:\Program Files\OpenVPN\easy-rsaand run:init-config.bat
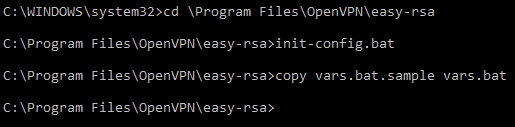
As a result, we will get a
vars.batfile that configures the environment for generating your keys and certificates.Open this file in Windows Notepad and specify a folder to store them; by default, it's '
keys':set KEY_DIR=keys
as well as the default values of your certificate owner's fields, for example:
set KEY_COUNTRY=GB
set KEY_PROVINCE=YourProvince
set KEY_CITY=YourCity
set KEY_ORG=YourOrganisation
set KEY_EMAIL=mail@example.com
set KEY_CN=CommonName
set KEY_NAME=KeyName
set KEY_OU=OrganisationUnit
Save the changed file.
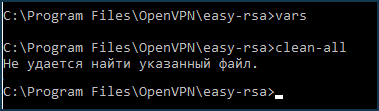
Create new
index.txtand serial auxiliary files by executing (once) in the Windows command line:vars clean-all
Create a
private keyandcertificatefor your certificate authority by doing the following:vars build-ca
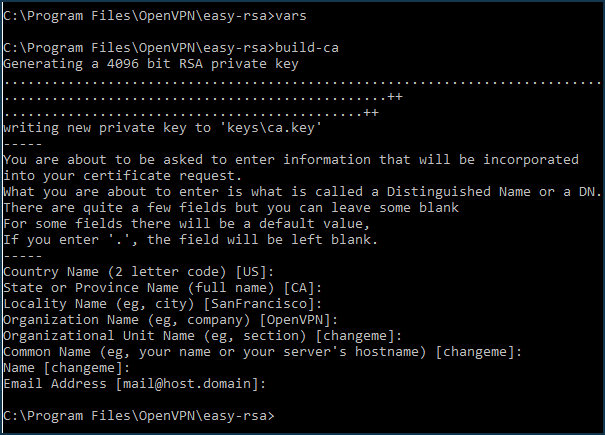
The generated
ca.keyandca.certfiles of your certification authority will appear in theC:\Program Files\OpenVPN\easy-rsa\keysfolder.Create a
Diffy-Helmanfile to protect your traffic from decryption. The TLS server will use it. In some cases, the procedure may take some time ( for example, when the key size is4096 bits, it takes tens of minutes), but it has to be done only once:vars build-dh
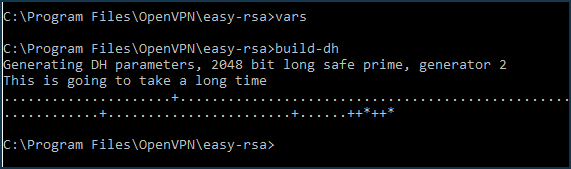
The file
dh2048.pem(or dh4096.pem when using a4096-bitkey size) will appear in theC:\Program Files\OpenVPN\easyrsa\keysfolder.Create a private key and certificate for the OpenVPN TLS server (Keenetic-1) by executing:
vars
build-key-server Keenetic-1
When the script asks for
Common Name (CN), enter the server name, such as Keenetic-1. In the end, double confirm (y) that you are signing the certificate.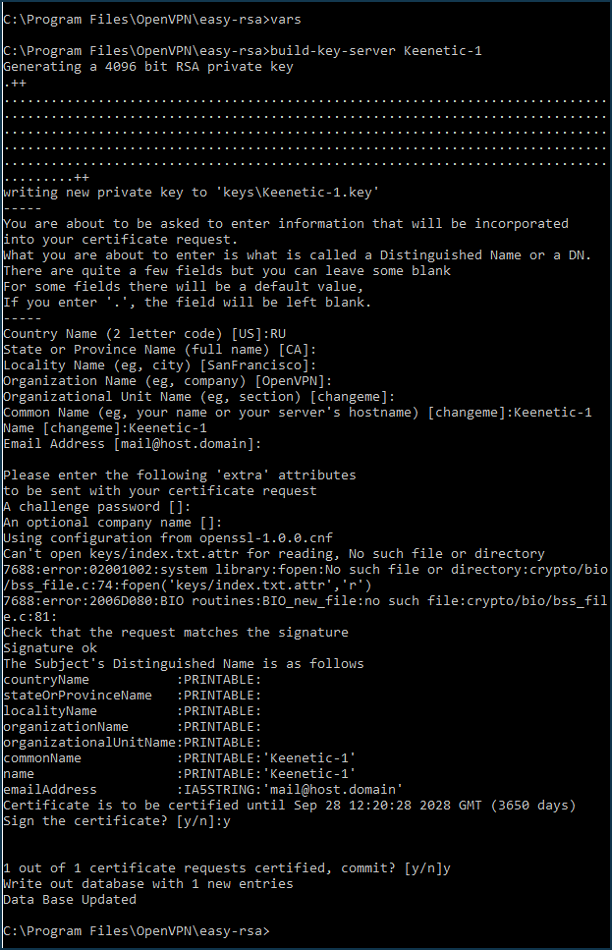
Create the
private key,PEM requestandcertificatefor the first OpenVPN TLS client (Keenetic-2) by executing:vars build-key Keenetic-2
When the script asks for
Common Name (CN), enter the name of the first client — Keenetic-2. Confirm twice (y) that you are signing the certificate.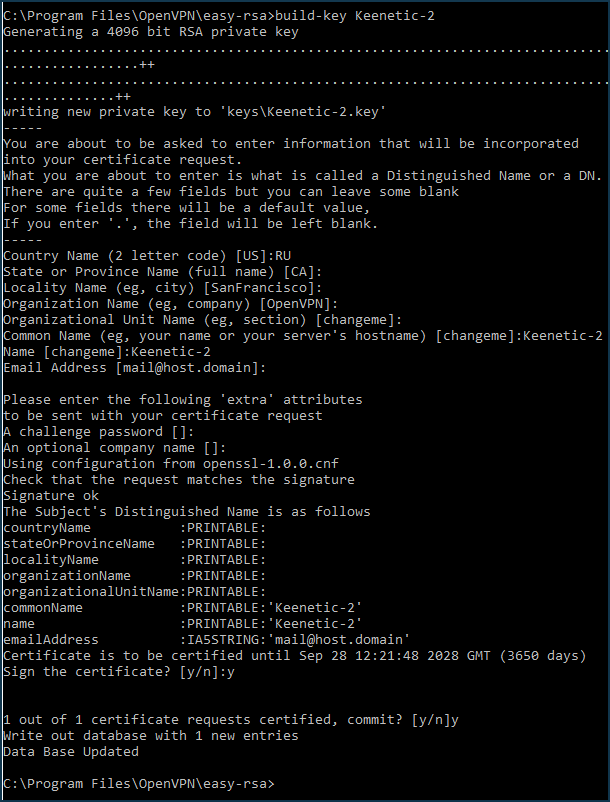
Repeat the previous step for the second client (Keenetic-3):
vars
build-key Keenetic-3
When the script will ask for
Common Name (CN), enter the name of the second client — Keenetic-3. Confirm twice (y) that you sign the certificate.Similarly, you can create
keys,queries, andcertificatesfor any number of clients.Create an
HMAC keyfor additional protection against DoS attacks and flooding by executing:vars openvpn.exe --genkey --secret keys\ta.key

At this point, all the necessary files are created:
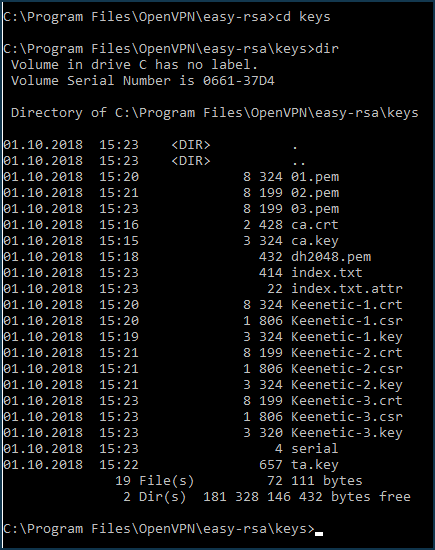
The following files are required for use in OpenVPN server and clients configs:
ca.crt— certificate of the certification centredh2048.pem (or dh4096.pem)— Diffy-Helman fileKeenetic-1.crt— OpenVPN server certificate (Keenetic-1)Keenetic-1.key— OpenVPN server private key (Keenetic-1)Keenetic-2.crt— certificate of the 1st OpenVPN client (Keenetic-2)Keenetic-2.key— private key of the 1st OpenVPN client (Keenetic-2)Keenetic-3.crt— certificate of the 2nd OpenVPN client (Keenetic-3)Keenetic-3.key— private key of the 2nd OpenVPN client (Keenetic-3)ta.key— HMAC key for additional protection against DoS-attacks and flooding
The only thing left to do is to add their contents to the server and client configuration text files.
To create an OpenVPN server configuration file, use the example
server.ovpnlocated in theC:\Program Files\OpenVPN\sample-config\. You will need to insert thekeysandcertificatesinto it as follows:Replace the line:
ca ca.crt
with the section:
<ca>
-----BEGIN CERTIFICATE-----
  <--Insert the body of the certificate of the certification centre from the file ca.crt here
-----END CERTIFICATE-----
</ca>
Replace:
cert server.crt
with the section:
<cert>
-----BEGIN CERTIFICATE-----
  <--Insert the body of the OpenVPN server certificate from the Keenetic-1.crt file here
-----END CERTIFICATE-----
</cert>
Replace the line:
key server.key
with the section:
<key>
-----BEGIN PRIVATE KEY-----
  <--Insert the body of the OpenVPN server private key from the Keenetic-1.key file here
-----END PRIVATE KEY-----
</key>
Replace the line:
dh dh2048.pem
with the section:
<dh>
-----BEGIN DH PARAMETERS-----
  <--Insert the contents of the file Diffie-Helman dh4096.pem here
-----END DH PARAMETERS-----
</dh>
Uncomment the line:
topology subnet
Replace the line:
server 10.8.0.0 255.255.255.0with the line:
server 10.1.0.0 255.255.255.0Comment out the line:
;ifconfig-pool-persist ipp.txt
Replace the line:
tls-auth ta.key 0
with the section:
<tls-auth>
-----BEGIN OpenVPN Static key V1-----
   <--Сюда вставьте содержимое файла ta.key
-----END OpenVPN Static key V1-----
</tls-auth>
and add the line:
key-direction 0
Comment out the line:
;status openvpn-status.log
To create the
configuration filefor the first OpenVPN client, use the example ofclient.ovpnlocated in theC:\Program Files\OpenVPN\sample-config\. You will need to insert thekeysandcertificatesinto it as follows:In the line:
remote my-server-1 1194
replace
my-server-1with the domain name or public IP address of your OpenVPN server (Keenetic-1).Replace the line:
ca ca.crt
with the section:
<ca>
-----BEGIN CERTIFICATE-----
  <--Insert the body of the certificate of the certification authority from the file ca.crt here
-----END CERTIFICATE-----
</ca>
Replace the line:
cert client.crt
with the section:
<cert>
-----BEGIN CERTIFICATE-----
  <--Insert the body of the certificate of the first OpenVPN client from the file Keenetic-2.crt
-----END CERTIFICATE-----
</cert>
Replace the line:
key client.key
with the section:
<key>
-----BEGIN PRIVATE KEY-----
  <--Insert the body of the private key of the first OpenVPN client from the Keenetic-2.key file here
-----END PRIVATE KEY-----
</key>
Replace the line:
tls-auth ta.key 1
with the section:
<tls-auth>
-----BEGIN OpenVPN Static key V1-----
  <--Insert the contents of the ta.key file here
-----END OpenVPN Static key V1-----
</tls-auth>
and add the line:
key-direction 1
Add a line with the route to the server's local network:
route 192.168.1.0 255.255.255.0
or:
route 0.0.0.0 0.0.0.0
if all traffic needs to be routed into the tunnel.
Repeat the same actions for the second client by taking the data from
Keenetic-3.crtandKeenetic-3.keyfiles, respectively.Examples of such configuration files for three Keenetic clients are attached at the end of the article:
You can use them by replacing the
KEENETIC-1.mykeenetic.co.ukclient name in the clients' files with the domain name or public IP address of your Keenetic-1 server andcertificatesandkeysto the files generated by you.Now all you need to do is download them to Keenetic routers in the same way as in 1.5, 1.6 and perform the actions described in 1.7, 1.8 of this manual.
This is the end of the setup. Check that the tunnels are set up.
To do this, run ping the server's tunnel address from the client's side:
ping 10.1.0.1
and the server's address on its home network:
ping 192.168.1.1
Suggerimento
In the second part of the example, for simplicity, we performed all the operations in one folder, although for security reasons, it is recommended to place the certification authority on a separate computer, isolated from the Internet, and store the secret key only on it; and carry the certificate on removable media. Similarly, the private keys of the server and OpenVPN clients should only be placed on the respective sides of the tunnel. Only certificates can be exchanged.
We recommend that you read the following information: