Keenetic has a built-in IPsec VPN client/server. Thanks to this function, it is possible to combine several Keenetic routers into one network via an IPsec VPN tunnel following the strictest security requirements.
In most cases, IPsec VPN is used for secure connection to the office network (e.g., from the home network to corporate server) or for combining networks (e.g., two remote offices). With the IPsec VPN tunnel, you don't have to worry about file server data privacy, IP telephony or video surveillance streams. IPsec is one of the most secure VPN protocols due to crypto-resistant encryption algorithms.
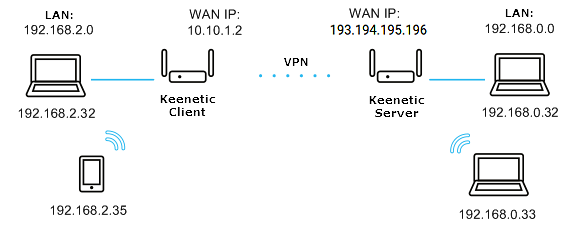
Let's take a look at an example of combining two local area networks (192.168.2.x and 192.168.0.x) over an IPsec VPN.
Importante
To build an IPsec VPN tunnel over the Internet, at least one of the routers must have a public IP address (on the WAN interface). For simplicity, it is recommended to use a permanent (static) IP address on the WAN interface and use the KeenDNS or DDNS domain name service to get a permanent name. For the IPSec tunnel to work, the KeenDNS service must only be running in the Direct Access mode on the router, which will be waiting for a connection.
The addresses of the connected networks should belong to different subnets. It is not recommended to use the same address space in the local and remote network, leading to a conflict of IP addresses.
Two Keenetic routers will be needed for an IPsec VPN connection. This type of connection is called a 'site-to-site connection'.
One Keenetic will act as an IPsec responder (let's call it a server), and the other Keenetic will act as the initiator of the IPsec connection (let's call it a client).
The router acting as an IPsec server has a public static IP address to connect to the Internet. The second Keenetc, which acts as an IPsec client, uses a private IP address.
So, let's move directly to configuring the routers to establish a secure IPsec VPN tunnel between them and connect the two networks.
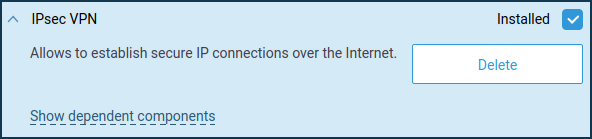
Both routers must have an 'IPsec VPN' system component installed on them.
You can do this by clicking 'Component options' on the 'General system settings' page in the 'Updates and component options' section.
Configuring Keenetic as a server (responder, waiting for IPsec connection).
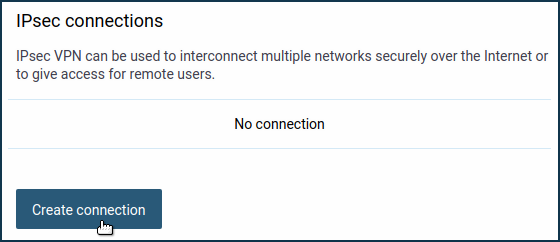
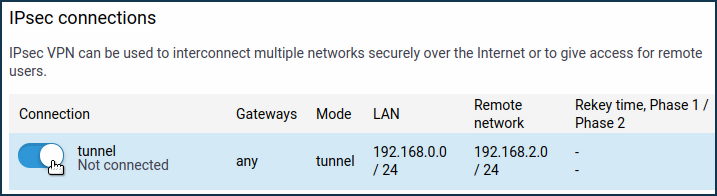
On the 'Other connections' page, under 'IPsec connections', click 'Create connection'.
The 'IPsec connection setup' window will open.
In our case, this Keenetic will act as a server, so enable the 'Wait for connection from a remote peer' option (in this case, the client will be the initiator of the connection, and the server will be waiting for the connection).
The 'Nailed-up' option is intended to keep the connection active and restore the tunnel in case of a break (this parameter can be enabled at one end of the tunnel).
The 'Dead peer detection' option is intended for determining the operability of the tunnel.
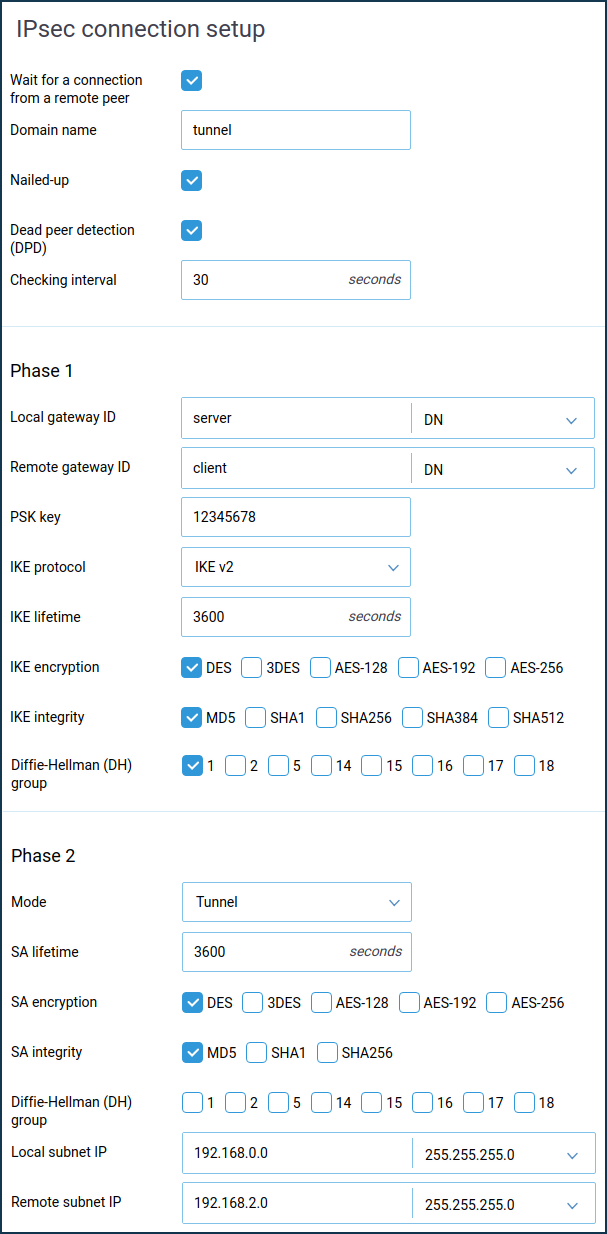
In the 'Phase 1' settings, 'Local Gateway Identifier' field you can use any identifier: 'IP address', 'FQDN' (full domain name), 'DN' (domain name), 'e-mail' (e-mail address). In our example, we use the identifier 'DN' (domain name) and enter a random name in the blank field of the identifier.
Importante
Pay attention to the local and remote gateway identifiers in the IPsec tunnel Phase 1 settings. The
IDs must be differentandmust be crossed out. For example, by selecting 'DN' as the identifier, set the server to 'DN':Local gateway ID:
serverRemote gateway ID:
client
and the client:
Local gateway ID:
clientRemote Gateway ID:
server
In the case of multiple tunnels, the settings of local and remote identifiers
must be unique for each tunnel.In the Phase 2 settings, field 'Local subnet IP', you should specify the address of the local network (in our example
192.168.0.0), and in the field 'Remote subnet IP', you should specify the address of the remote network that will be behind the IPsec tunnel (in our example192.168.2.0).Importante
The Phase 1 and Phase 2 settings must be the same on both sides of the IPsec VPN tunnel. Otherwise, the tunnel will not be installed.
After creating the IPsec connection, set the switch to 'On'.
Configuring Keenetic as a client (IPsec connection initiator).
On the 'Other connections' page, under 'IPsec connections', click 'Create connection'.
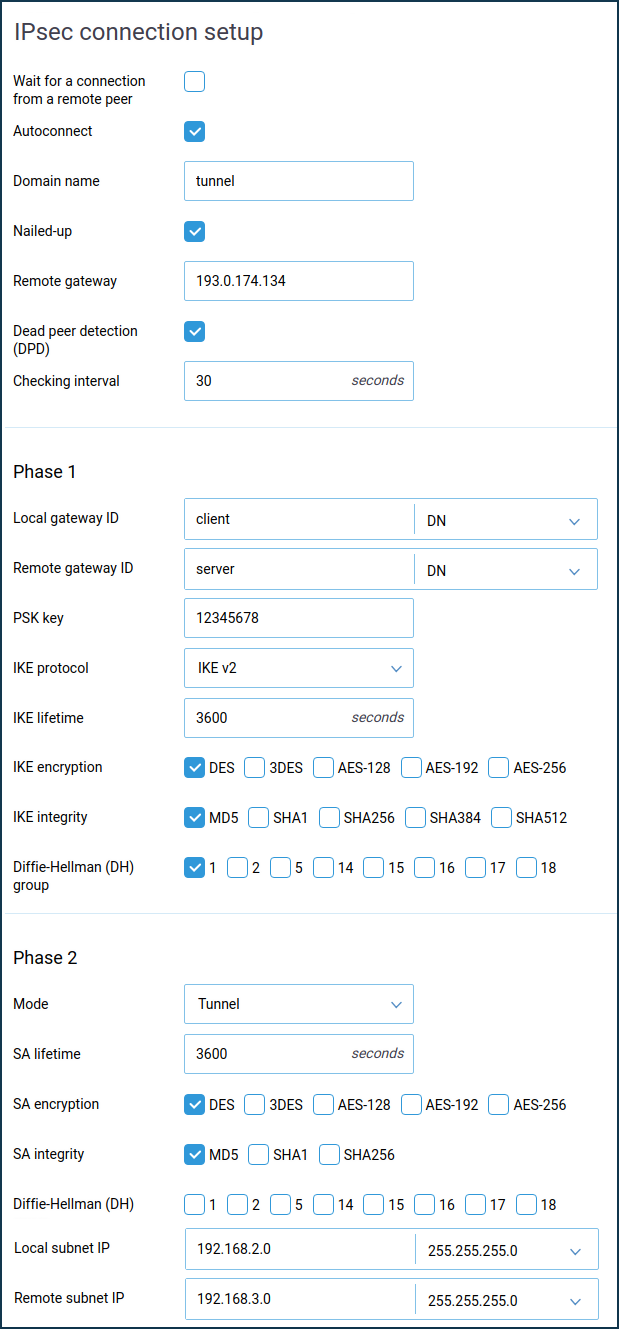
The 'IPsec connection setup' window opens. In our case, this Keenetic acts as a client, so enable the 'Autoconnect' option (in this case, the client initiates the connection).
The 'Nailed-up' option is intended to keep the connection active and restore the tunnel in case of a break (this parameter is enough to enable at one end of the tunnel).
The option 'Dead peer detection (DPD)' is intended to determine the tunnel's operation.
In the 'Remote gateway' field, specify the IP address or domain name of the remote Keenetic (can be the KeenDNS or DDNS name).
Importante
In the Phase 1 settings, the 'Local gateway ID' and 'Remote gateway ID' fields must have the same identifiers that you used on the remote router, but they must be crossed out. For example, by selecting 'DN' as the identifier, set it on the server:
Local gateway ID:
serverRemote gateway ID:
client
and the client:
Local gateway ID:
clientRemote Gateway ID:
server
In the case of multiple tunnels, the settings of local and remote identifiers must be unique for each tunnel.
In the Phase 2 settings, field 'Local subnet IP', you should specify the address of the local network (in our example
192.168.2.0), and in the field 'Remote subnet IP', you should specify the address of the remote network that will be behind the IPsec tunnel (in our example192.168.0.0).Importante
The Phase 1 and Phase 2 settings must be the same on both sides of the IPsec VPN tunnel. Otherwise, the tunnel will not be installed.
After creating the IPsec connection, set the switch to 'On'.
Verifying the status of the IPsec connection.
If the IPsec connection settings were set correctly on both devices, the IPsec VPN tunnel must be established between the routers.
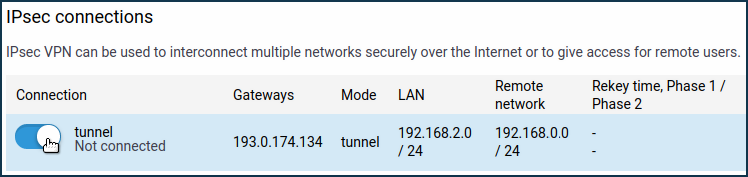
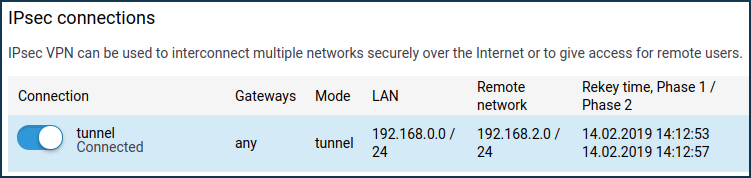
The IPsec connections' section on the 'Other connections' page shows the connection status. If the tunnel is established, the connection status will be 'Connected'.
Here is an example of the tunnel status on a Keenetic (as a client):
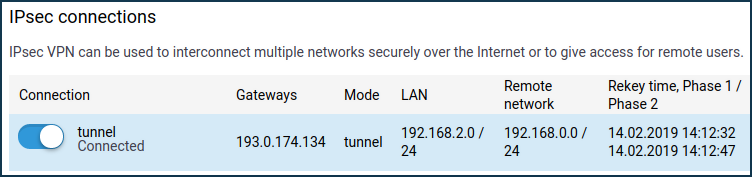
And here is an example of the tunnel status on a Keenetic (as a server):
To check if the tunnel is working, ping the remote Keenetic or a computer from the remote network behind the IPsec VPN tunnel.
Suggerimento
Broadcast packets (e.g. NetBIOS) will not pass through the VPN tunnel, so the names of the remote hosts will not be displayed in the network environment (they can be accessed via IP address, e.g.
\\192.168.2.27).If an IPsec VPN tunnel has been installed, but you are can only ping the remote Keenetic and not the hosts on the remote network, then it is most likely that the Windows Firewall or similar software is blocking ICMP traffic (
ping) on the hosts themselves.Suggerimento
We recommend using the IKE v2 version of the protocol. Use IKEv1 only when your device does not support IKEv2.
If you are experiencing interruptions in your VPN connection, try disabling the 'Nailed-up' and 'Dead peer detection (DPD)' options in the Keenetic router.