In Keenetic routers, it is possible to create IPIP (IP over IP), GRE (Generic Routing Encapsulation), EoIP (Ethernet over IP) tunnels both in pure form and in combination with IPSec tunnel, allowing to use IPSec VPN security standards to protect these tunnels.
The support of IPIP, GRE, EoIP tunnels in Keenetic routers allows you to establish a VPN connection with hardware gateways, Linux routers, computers and servers with UNIX/Linux OS, as well as with other network and telecommunications equipment that support these tunnels.
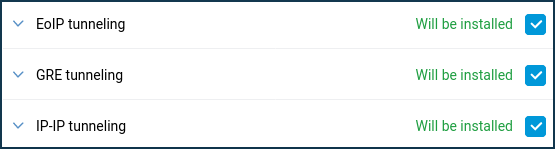
It is necessary to install additional corresponding components of the KeeneticOS system to work with tunnels:
'EoIP tunneling' (Allows creating Ethernet over IP tunnels);
'GRE tunneling' (Allows creating GRE tunnels);
'IP-IP tunneling' (Allows creating IP-over-IP tunnels).
You can do this on the 'General system settings' page in the 'Updates and component options' section by clicking on 'Component options'.
Brief description
IPIP and GRE tunnels are network layer tunnels (L3 of the OSI model), where IP addresses of both sides are available. They are presented in the system as GreX and IPIPX interfaces, and routing (including the default route) can be configured through them just like through any other interface. Also, these interfaces can be configured with a security level of access - private, protected, or public (information on access levels can be found in the article Configuring firewall rules with the command-line interface).
IPIP (IP over IP) is one of the easiest tunnels to set up (it encapsulates only unicast IPv4 traffic). You can configure it on a UNIX/Linux system and on different routers (e.g. Cisco).
GRE (Generic Routing Encapsulation) tunnel is one of the popular VPN types. GRE tunnels are compatible with hardware security gateways, Mikrotik routers, Linux routers and other similar equipment (e.g. Cisco, Juniper, etc.).
EoIP tunnel (Ethernet over IP) is a Datalink layer tunnel (L2 of the OSI model) over the network layer (L3). Data is transmitted through this tunnel at the Ethernet frame level. EoIP provides a transparent network environment that emulates a direct Ethernet connection between networks. All MAC addresses are visible, and it is possible to connect two L2 LANs over the Internet using this type of tunnel. EoIP uses GRE as its transport. The EoIP tunnel can work over IPIP, PPTP and any other connection capable of transmitting IP packets. Any traffic other than IP can be sent through it, including ARP, DHCP, PPPoE, IPv6, etc. Subnet scanning via ARP will work in the tunnel by default when the security level changes to private/protected. In the system, it is presented as an EoIPX interface.
EoIP is developed by MikroTik, so there is compatibility with them and Linux routers that know how to work with EoIP.
Importante
The IPIP, GRE, EoIP tunnels are of the point-to-point type. Both tunnel participants must have external IP addresses (or be on the same network), and there must be no NAT address translation between them. These are the prerequisites for establishing a tunnel.
In simple terms, there are no security mechanisms for these tunnels (no encryption or authentication mechanisms).
The IPIP, GRE and EoIP tunnels operate without saving the state of the connection, i.e. it is impossible to understand whether the tunnel is functional. We can only configure both sides and then check the data transfer.
You can use the Ping Check function on IPIP, GRE and EoIP tunnel interfaces to check its availability.
The IPIP, GRE and EoIP tunnels work directly over the IPv4 protocol. IPIP uses IP protocol number 4, GRE and EoIP use IP protocol number 47.
Examples
Importante
At the moment, the configuration of IPIP, GRE and EoIP tunnels is implemented through the command-line interface (CLI) of the router. The full syntax of the commands listed in this article can be found in the Command Reference Guide in the Download Center.
The following examples show private IP addresses, which can only be used within the local network. There must be public IP addresses at both ends of the tunnels to create tunnels over the Internet.
Setting up a GRE/IPIP tunnel between two Keenetic routers.
Example 1. One side of the tunnel setup:
(config)>
interface IPIP0(config-if)>tunnel destination router1.example.com(config-if)>ip address 192.168.100.1 255.255.255.0(config-if)>security-level private(config-if)>up(config-if)>exit(config)>system configuration saveAt the other end of the tunnel, 'mirror' settings are set:
(config)>
interface IPIP0(config-if)>tunnel destination 8.6.5.4(config-if)>ip address 192.168.100.2 255.255.255.0(config-if)>security-level private(config-if)>up(config-if)>exit(config)>system configuration saveYou can then try to ping the address of the remote side of the tunnel from any side to check if the tunnel is working correctly.
It should be noted that as a destination, you can specify either the domain name (Cloud Mode in KeenDNS will not work!) or the IP address of the remote side (WAN interface of the device).
For GRE, the interface name is
Gre0.Example 2. One side of the tunnel setup:
(config)>
interface IPIP0(config-if)>tunnel destination router1.example.com(config-if)>ip address 192.168.100.1 255.255.255.0(config-if)>up(config-if)>exit(config)>no isolate-private(config)>ip route 10.10.2.0 255.255.255.0 IPIP0/*static route to a remote private subnet 10.10.2.0/24 through the tunnel*/ (config)>system configuration saveAt the other side of the tunnel:
(config)>
interface IPIP0(config-if)>tunnel destination 8.6.5.4(config-if)>ip address 192.168.100.2 255.255.255.0(config-if)>up(config-if)>exit(config)>no isolate-private(config)>ip route 10.10.1.0 255.255.255.0 IPIP0/*static route to a remote private subnet 10.10.1.0/24 through the tunnel*/ (config)>system configuration save
Setting up an EoIP tunnel between two Keenetic routers.
In the case of the EoIP tunnel, the settings will be absolutely the same, except for two things:
you can set the interface MAC address;
EoIP tunnel ID, tunnel identifier (number in the range from
1to65535) must be set, and it must match at both ends of the tunnel.
One end of the tunnel setup:
(config)>interface EoIP0(config-if)>tunnel destination router1.example.com(config-if)>tunnel eoip id 1500(config-if)>ip address 192.168.100.1 255.255.255.0(config-if)>security-level private(config-if)>up(config-if)>exit(config)>system configuration save
The 'mirror' setting is at the other end of the tunnel:
(config)>interface EoIP0(config-if)>tunnel destination 8.6.5.4(config-if)>tunnel eoip id 1500(config-if)>ip address 192.168.100.2 255.255.255.0(config-if)>security-level private(config-if)>up(config-if)>exit(config)>system configuration save
You can then try to ping the address of the remote side of the tunnel from any side to check if the tunnel is working correctly.
The EoIPx interface can be included in the Bridge to join local networks. To do this, configure the EoIP interface without an IP address on both sides and then add it to the Bridge Home:
(config)>interface Home(config-if)>include EoIP0(config-if)>exit(config)>system configuration save
Importante
For IPIP, GRE and EoIP tunnel interfaces, the MTU value is automatically calculated based on the interface through which the traffic will go, but it can be set manually through the command interface ip mtu.
When connecting local networks using the EoIP tunnel, we recommend using manually specified static IP addresses on hosts. If clients are configured to obtain IP addresses from a DHCP server automatically, problems may arise with IP address allocation after the tunnel is established because DHCP requests will go into the tunnel, i.e. the remote network.
Using IPIP, GRE and EoIP tunnels with IPSec
If a special system component IPSec VPN is installed, it is possible to protect these tunnels using IPSec safety standards, both in automatic and fully manual mode. We will not describe the manual mode because experienced users can set up an IPSec tunnel with the correct mode and then raise the tunnel over IPSec. In the case of automatic configuration, several manual mode problems are solved at once:
MTU value is set correctly;
the connection becomes connection-oriented, and you have to choose which end of the tunnel is the client and which end is the server;
automatically resolves the problem of NAT pass-through because it uses IPSec NAT Traversal (NAT-T), which turns all tunnel traffic into a UDP stream on port
500/4500;encryption and data integrity checks are used.
The IPSec VPN component appends the following settings to tunnels:
interface ipsec preshared-key <key>— PSK for encryption;interface ipsec encryption-level <level>— encryption level. By default, it is set to cover as many devices as possible and is hardware accelerated. There's no need to change.
Since IPSec separates a client from a server, to configure the client (the initiator, the side that will try to establish the connection), you must use the command interface tunnel destination, and to enable the server mode (the party that will respond to connection attempts), you must use the command interface tunnel source.
Example of EoIP tunnel configuration with IPsec (in our example, the side with the WAN address 8.6.5.4 is the server):
Server:
(config)>interface EoIP0(config-if)>tunnel source ISP(config-if)>tunnel eoip id 1500(config-if)>ipsec preshared-key mytestingkey(config-if)>ip address 192.168.100.1 255.255.255.0(config-if)>ipsec ikev2(config-if)>security-level private(config-if)>up(config-if)>exit(config)>system configuration save
Client:
(config)>interface EoIP0(config-if)>tunnel destination 8.6.5.4(config-if)>tunnel eoip id 1500(config-if)>ipsec preshared-key mytestingkey(config-if)>ip address 192.168.100.2 255.255.255.0(config-if)>ipsec ikev2(config-if)>security-level private(config-if)>up(config-if)>exit(config)>system configuration save
Importante
The pre-shared IPSec PSK key must match at both ends of the tunnel.
In the interface tunnel source command, you can specify both the source interface and the IP address where the server will be waiting for the connection. However, preference is given to the interface, because in this case, all the reconfiguration when changing the address and other events will take place automatically.
Avviso
Tunnels based on EoIP/IPSec and GRE/IPSec are not compatible with PPTP connections due to using the same GRE protocol. In this case, there is only one option available: IPIP/IPsec.
Importante
Pay attention to the isolate-private option.
It is not allowed to establish a connection between private interfaces by default, but access can be granted if necessary. If you need to allow connections between private interfaces (i.e. do not isolate access), run the command no isolate-private.
Use the command system configuration save to save the router settings.