IKE client
Starting with KeeneticOS 3.5, an IKEv1/IKEv2 client has been added as a separate component that allows a router to establish client connections via IKEv1 and IKEv2.
IKEv2 (Internet Key Exchange) is a version 2 key exchange protocol included in the IPSec protocol suite. It provides high data security, speed and stability.
To set up secure IKEv2 connections on your Keenetic router, you must install the 'IKEv1/IPsec and IKEv2/IPsec VPN clients' system component. You can do this in the web interface on the 'General system settings' page under 'KeeneticOS update and component options' by clicking on 'Component options'.

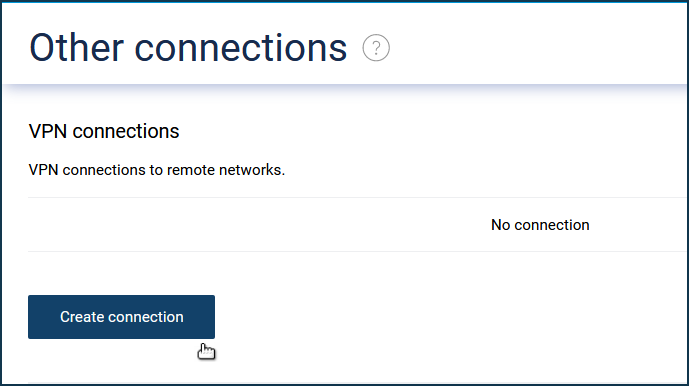
Afterwards, in the 'Other connections' page under 'VPN connections', click 'Create connection' to add and set up an IKE client.
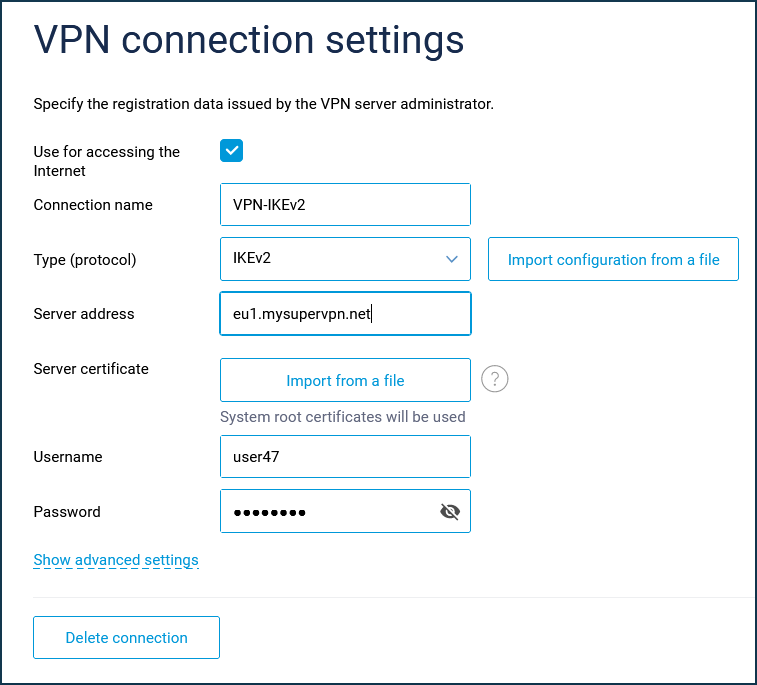
In the 'VPN connection settings' screen, enter the registration information provided by your VPN provider or VPN server administrator.
If you want to use this connection to access the Internet, enable the option.
Enter any name to identify the connection in the 'Connection name' field, enter 'IKEv2' or 'IKEv1' in the 'Type (protocol)' field and specify the server address, user name and password. In our example, an IKEv2 VPN connection is used.
Note
The IKEv2 client uses an IKEv2 EAP (Login/Password) connection.
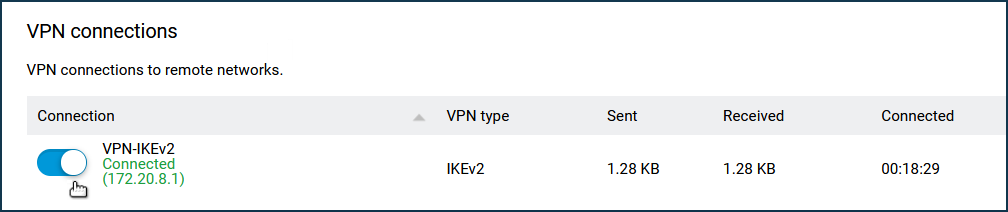
Once the connection has been established, toggle the switch to Enabled.
The same page will show the status of this connection.
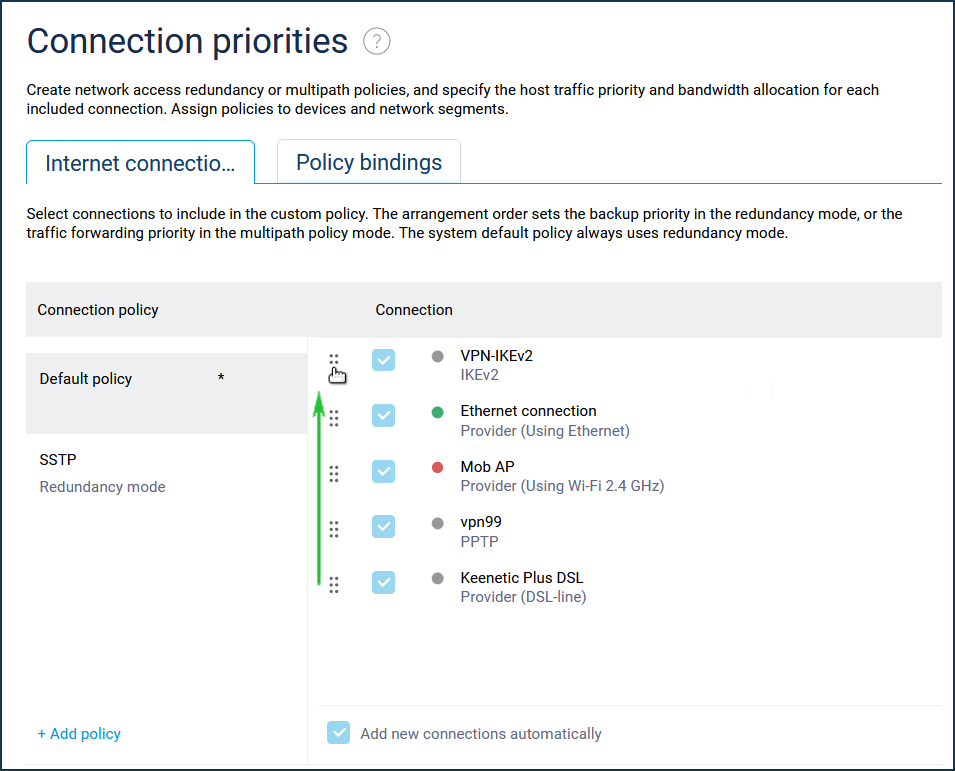
If the connection is used to access the Internet (e.g. you connect via a VPN provider), assign the highest priority to this connection. Drag the created VPN connection profile to the top of the list.
For information on priorities, see the article Connection priorities.
To set up an IKEv2 server on Keenetic, see the article IKEv2/IPsec VPN server.