Captive portal
Captive portal service gives the ability to organise a public (or guest) Wi-Fi zone with user authorisation.
A Captive portal is the authorisation page that forcibly redirects users who connect to the public network before accessing the Internet.
How a captive portal works
The operation principle of all such systems is the interception of the HTTP/HTTPS session of a user who connects to a public network and redirection to an external web server for authorisation. Then the user can be authorised via SMS or callback to his cell phone number. After authorisation is complete, the user gets access to the Internet.
Captive portal accesses a RADIUS server (which resides on the captive portal service provider's side), which is used for resource allocation (Provisioning) — connection time limit (session timeout), speed, traffic volume, and resource consumption control (Accounting).
Captive portals use the Universal Access Method (UAM) — a universal access control method with AAA (Authentication, Authorisation, Accounting) and RADIUS.
3-rd party companies provide this service, and a Keenetic router is considered as the captive portal's client to work with their service.
The implementation of a captive portal in a Keenetic device is based on the open-source service Coova-Chilli. Most likely, a hotspot will successfully work with a captive portal service provider that supports Coova-Chilli.
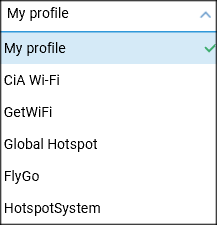
For users' convenience, the most popular captive portal providers' profiles were added. Those companies also conducted tests from their side and confirmed the correct work with their implementation of the captive portal. To configure it, select a profile from the drop-down list and specify the required connection parameters from the personal account on the service provider's website.
The captive portal implemented in Keenetic routers currently supports around 20 providers, including http://worldspot.net, http://www.hotspotsystem.com, https://www.ironwifi.com.
All the providers mentioned above are cloud services. Authorisation takes place remotely on the servers of these companies. Besides them, there are so-called out-of-box solution providers that offer software for installation on customers' servers. In this case, a customer gets full control over the entire authorisation system.
At the same time, you can configure a profile manually if the provider gave you credentials for the connection. The profile for manual configuration is described in the 'Tip' section at the bottom of this article.
To use a captive portal, first, you need to install the right system component.

The Captive portal service will be available on the 'Guest network' page in the 'Captive portal' section.
Important
The Captive portal component can only be run on a Keenetic device in Router Mode.
Example of Captive Portal configuration
Let's take a HotspotSystem cloud operator as an example.
First, we need to enable 'Captive portal' on the 'Guest network' page and choose the 'HotspotSystem' profile in the 'Profile' field.
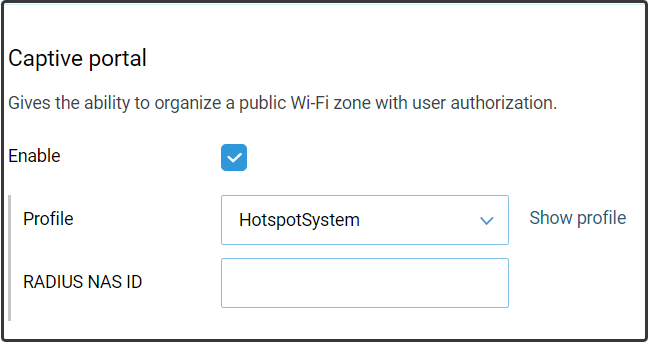
You must fill 'Radius NAS ID' by yourself after passing authorisation on the captive portal provider's website.
To review full profile settings, click on 'Show profile'.

If some settings need to be changed, click on 'Edit profile'.
Important
All profiles were integrated after successful tests. Do not edit the preset profile unless necessary.
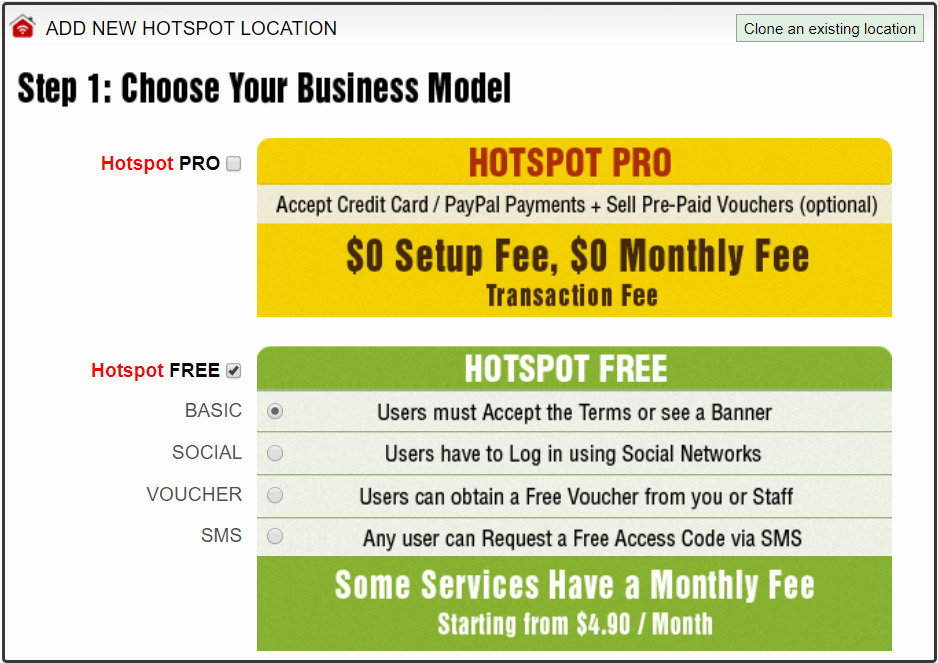
Log in to the HotspotSystem website.
After you pass authorisation and sign in, you must add a new hotspot location based on your business model. HotspotSystem offers two types of business models: PRO and FREE.
The PRO version assumes commercial access when users pay for Internet service by credit card or buy a voucher.
In this example, we choose the free one where a user has to accept the terms of use or see a banner before he gets Internet access:
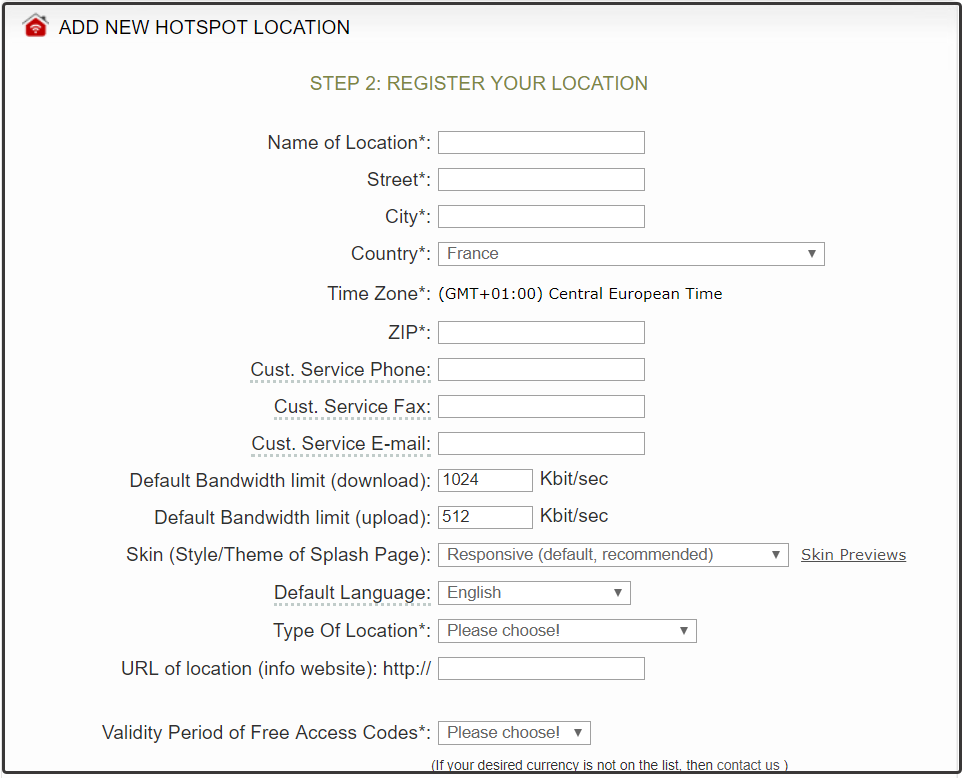
Then you have to enter detailed information about your hotspot location:
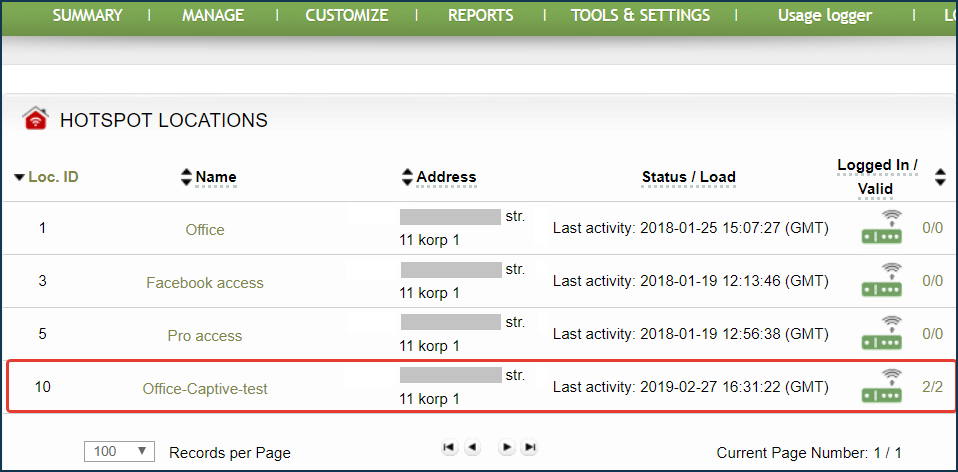
After you complete the hotspot registration, you will see it in the main menu of the HotspotSystem website. To see the list of your hotspots, go to 'Manage — Locations':
After you complete the hotspot configuration, the service will start working on your guest Wi-Fi (it's the 'Guest network' by default). The Guest network, in this case, can be either with or without a password (WPA-PSK).
Your Keenetic router allows you to separate the guest network (Captive portal) and the main network. Users who connect to the guest network need to pass authorisation to access the Internet. And those users or network devices that connect to the main network will have access to the Internet without authorisation. It could be system administrators or cameras. Each LAN port could be independently configured for one of the networks.
If you want to extend your wireless network coverage area, including the one with the captive portal, you may connect additional Keenetic devices in Access Point/Extender Mode to your Main Router.
Example of a connection to a captive portal
After connecting a mobile device to the public (guest) network, when you first time access any website on the Internet, you will be redirected to a special authorisation page.
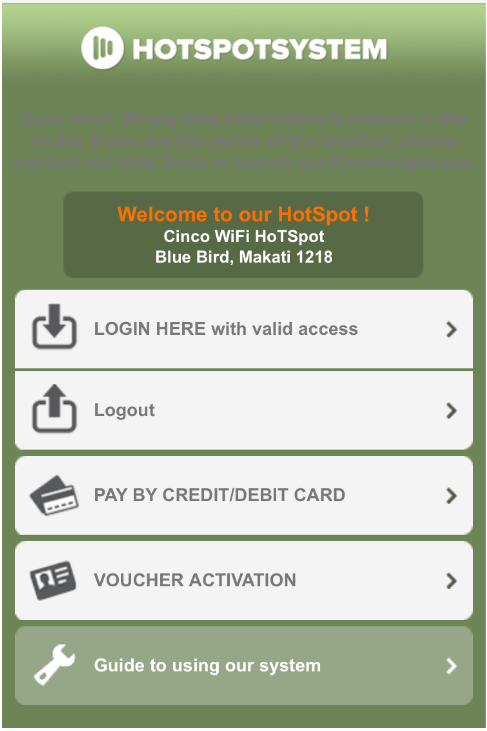
Choose the type of access that you previously set on the router when you added the hotspot.
Tip
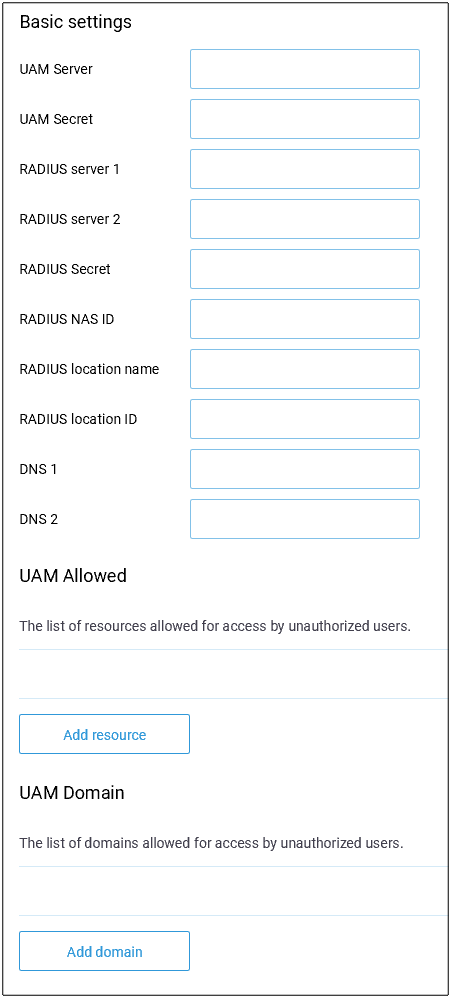
Manual configuration of Captive portal.
If the provider supplies the connection data, it is possible to manually configure the captive portal service provider profile.
The profile for manual configuration is presented below.
Important
By default, Keenetic has a lease time of 3600 seconds for the connected client IP address. Therefore, after being disconnected for more than 1 hour you will need to reinitialise the Internet session. If this is inconvenient, the time can be extended by using the command:
interface Chilli0 chilli lease [time in seconds]