SSTP VPN server
You can set up an SSTP server in your Keenetic. It allows you to connect users to the local network remotely.
Importante
The main advantage of the SSTP (Secure Socket Tunnel Protocol) tunnel is its ability to work through the Keenetic KeenDNS cloud servers, i.e. it allows you to establish a connection between the client and the server, even if there are private IP addresses on both sides. All other VPN servers require a public IP address.
Data transfer in the SSTP tunnel is carried out with the help of HTTPS traffic.
Since the SSTP server works through the KeenDNS cloud, its speed depends on the number of users using the cloud and their activity.
To connect to the SSTP server, you do not need to install any additional programs in the Windows operating system. In Android, you will need to install an additional application. Also, Keenetic itself can act as an SSTP client. You can find more information in the SSTP client article.
To configure the server, it is necessary to install the 'SSTP VPN server' component. You can do this on the 'General system settings' page in the 'Updates and component options' section by clicking on 'Component options'.

Then go to the 'Applications' page. Here you will see the 'SSTP VPN server' panel.
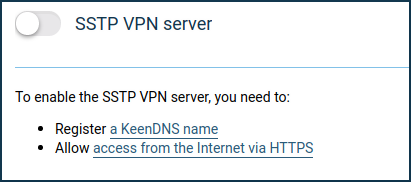
To operate the server, you need to register your Keenetic in the KeenDNS cloud service and get a domain name on the *.keenetic.link or *.keenetic.pro or *.keenetic.name domain that supports SSL security certificates. Otherwise, the client connecting to the server will not be able to establish a trusted HTTPS connection. You will find information on how to register a KeenDNS name in the KeenDNS service article.
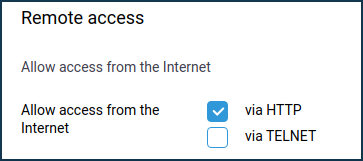
Also, you need to allow access from the Internet via HTTPS protocol. You can do this on the 'Users' page. In the 'Remote Access' section, enable the 'Allow access from the Internet': 'via HTTP' option.
Now let's move on to the SSTP server setup.
On the 'Applications' page, click on the 'SSTP VPN server' link.
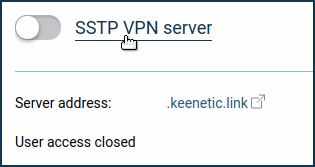
Configure the server.
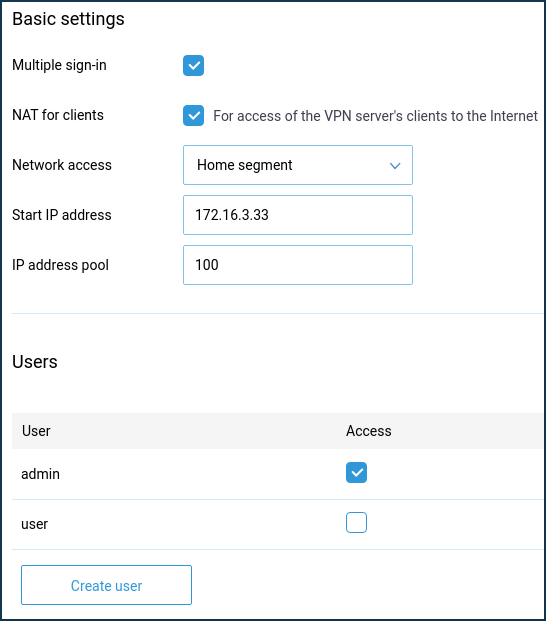
The 'Multiple sign-in' parameter controls the ability to establish several simultaneous connections to the server using the same credentials. This is not a recommended scenario due to the lower security level and the disadvantages in monitoring. However, during the initial configuration, or in cases where you want to allow the installation of a tunnel from multiple devices of the same user, you can leave the option enabled.
Importante
If the 'Multiple sign-in' option is disabled, it is possible to assign a static IP address to the SSTP client. You can do this on the VPN server configuration page in the 'Users' section.
By default, the 'NAT for clients' option is enabled in the server configuration. This setting is used to allow VPN server clients to access the Internet. In a built-in Windows client, this feature is enabled by default, and when a tunnel is established, requests to the Internet will be sent through it. In the case of 'Cloud access' mode (KeenDNS service setting), we recommend not to use the 'NAT for clients' setting, because the tunnel throughput in the cloud connection may be lower than the throughput of the server or client Internet connection.
Importante
If you disable the 'NAT for clients' function on the server but do not reconfigure the default routing policy in the Windows client, the Internet access may not work after the installation of the tunnel on the computer.
In server settings in the 'Network access' field, you can also specify a segment different from the Home segment, if necessary. In this case, the network of the specified segment will be available through the tunnel.
The total number of possible simultaneous connections is set by the IP address pool size value. As with the initial IP address, this setting should not be changed without necessity.
Importante
If the 'Start IP address' falls within the network range of the segment specified in the 'Network Access' field, the ARP-Proxy function is enabled to allow access to such VPN client from the specified local segment.
For example, if the home network 192.168.1.0 with a netmask of 255.255.255.0 and the DHCP server setting of 'Start Pool Address': 192.168.1.33, 'IP address pool': 120 is selected, you can set the 'Start IP address' of the VPN server to 192.168.1.154, which falls in the range 192.168.1.1 ~ 192.168.1.254, and have access from the home network to the VPN clients in the same way as access to the local devices.
In the 'Users' section, select the users you want to allow access to the SSTP server and the local network. Here you can also add a new user by specifying a username and password.
After configuring the server, set the switch to the 'Enabled' state.
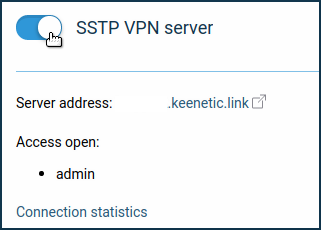
By clicking on the 'Connection statistics' link you can see the connection status and additional information about active sessions.

If you want to provide clients with access not only to the local network of the VPN server but also in the opposite direction, i.e. from the network of the VPN server to the remote network of the VPN client, to provide data exchange between the two sides of the VPN tunnel, refer to the Routing networks through VPN article.
Nota
To connect to the server as a client, you can use:
Keenetic router — SSTP client;
Windows PC — SSTP connection in Windows;
Android mobile device — SSTP connection in Android.