An IPv6 connection with Hurricane Electric tunnel broker
IPv6 over IPv4 tunnels are used to access Internet resources over IPv6 protocol when your public address is IPv4. To set up your connection, register with an IPv6 virtual provider (tunnel broker) running 6in4 technology. You will get the connection settings when you register.
Importante
The requirements for connecting to an IPv6 Tunnel Broker are as follows:
a static public IP address on the external interface;
ping to the router from the Internet must be allowed: your ISP should not block incoming ICMP packets, and you have to create a Firewall rule to respond to ping requests on Keenetic.
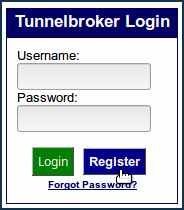
Go to the tunnel broker's page Hurricane Electric.
Click the 'Register' button to enrol in the service.
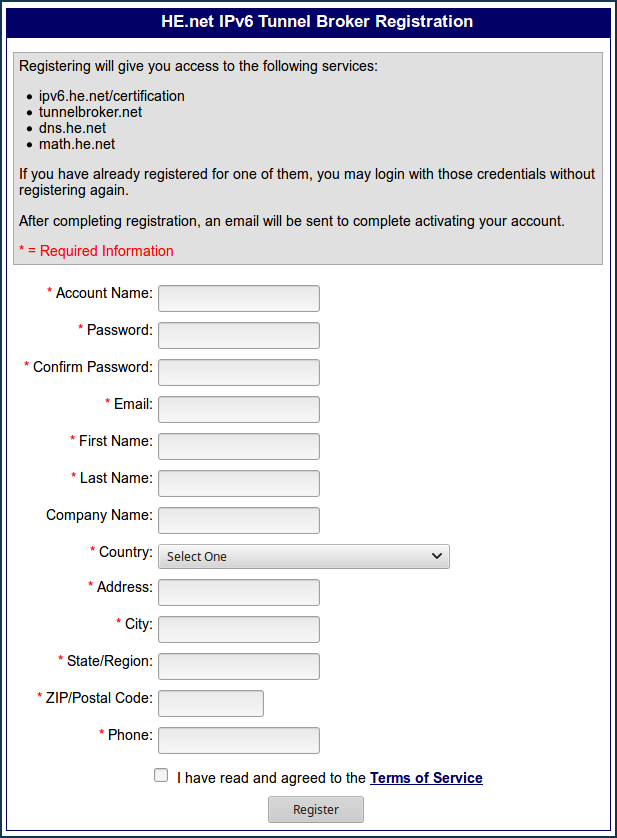
In the 'IPv6 Tunnel Broker Registration' window, enter the required information and click the 'Register' button.
To create a tunnel, click on the 'Create Regular Tunnel' link.

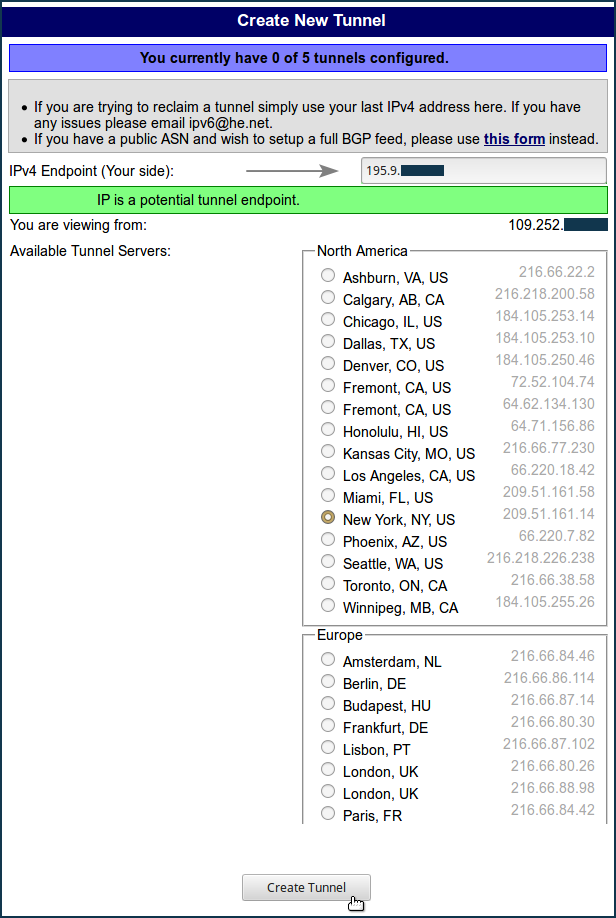
In the 'Create New Tunnel' window, enter the static public IP address of the Keenetic in the 'IPv4 Endpoint (Your side)' field. You can check it in the web interface on the System dashboard page.
In the 'Available Tunnel Servers' table, select the tunnel server. You can choose the server closest to you by territory or keep the one automatically selected. Press the 'Create Tunnel' button to continue.
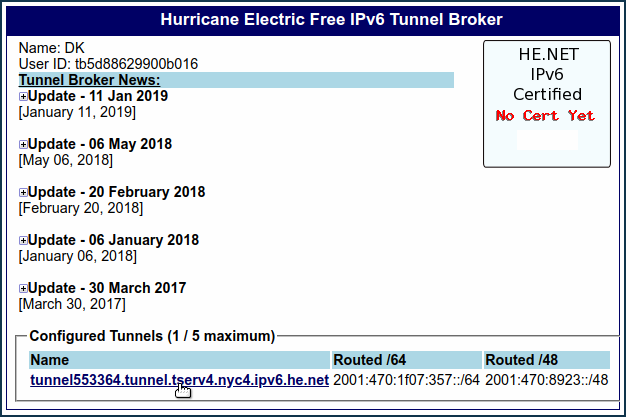
Then, in the 'Configured Tunnels' section, click on the link of the created tunnel for detailed information about the IPv6 tunnel.
The 'Tunnel Details' window on the IPv6 tab provides all the necessary information to configure an IPv6 tunnel over IPv4 in the Keenetic.
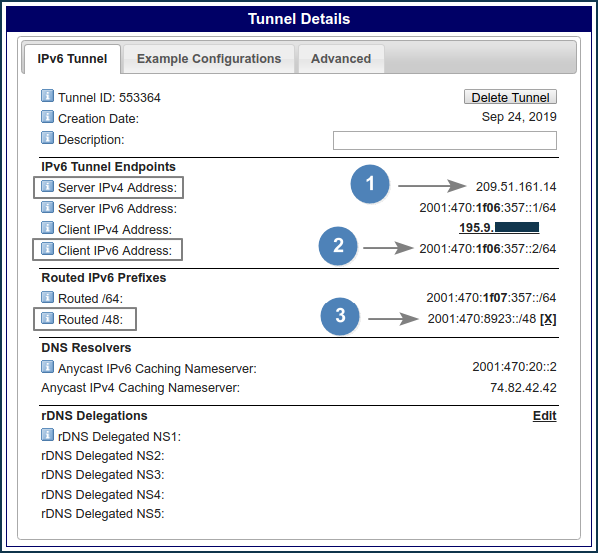
'Routed /48' does not immediately display prefix information. To get the prefix, press 'Assign'.
You'll need the following information:
Server IPv4 Address
Client IPv6 Address
Routed /48 (IPv6 prefix)
Connect to the Keenetic Web Interface.
To work with the IPv6 protocol, you should install the 'IPv6' system component on the Keenetic. Make sure that you did it. Check it on the 'System settings' page in the 'Updates and component options' section by clicking on 'Component options'.

If the 'IPv6' component is not installed, install it.
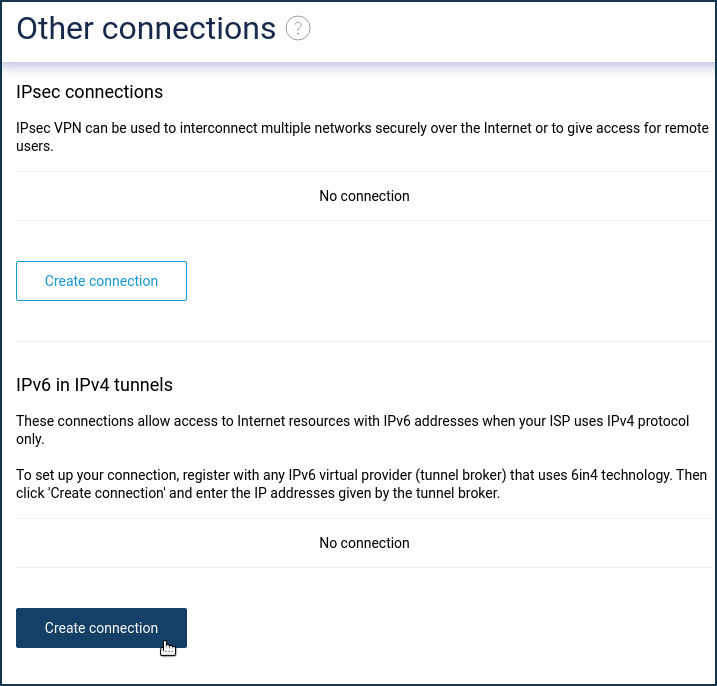
Then go to the 'Other connections' page, and in the 'IPv6 in IPv4 tunnels' section, click 'Create connection'.
In the 'Connection settings' window, be sure to enable the 'Use for accessing the Internet' option. In the 'Connection name' field, specify any name to describe the connection. In the 'IPv4 address' field, you should enter the server address for connection (specified in the broker's control panel in 'Server IPv4 Address'). In the 'IPv6 address' field, insert the client address specified in the control panel in 'Client IPv6 Address' (add the address without the
/64 prefix). And in the 'IPv6 prefix' field, insert the address from 'Routed /48'.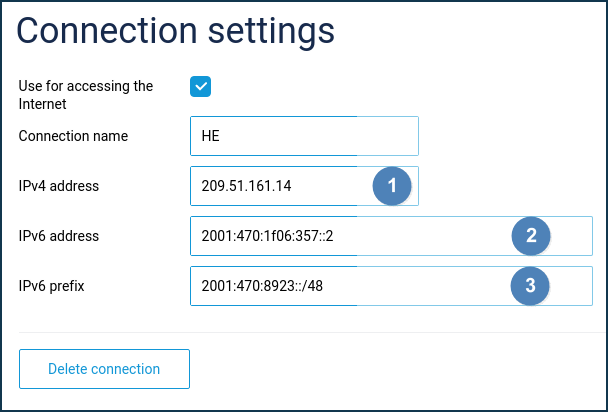
Click 'Save' to save the router configuration.
On the 'Other connections' page, to activate the tunnel, set the switch to the 'On' state.
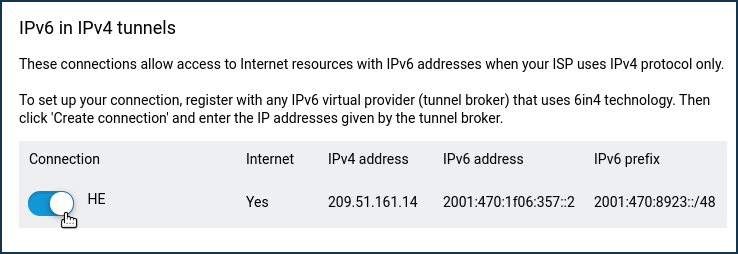
To check the connection, go to the 'Diagnostics' page; in the section 'Network connection test', put the switch to 'Ping IPv6' and click 'Start the test'.
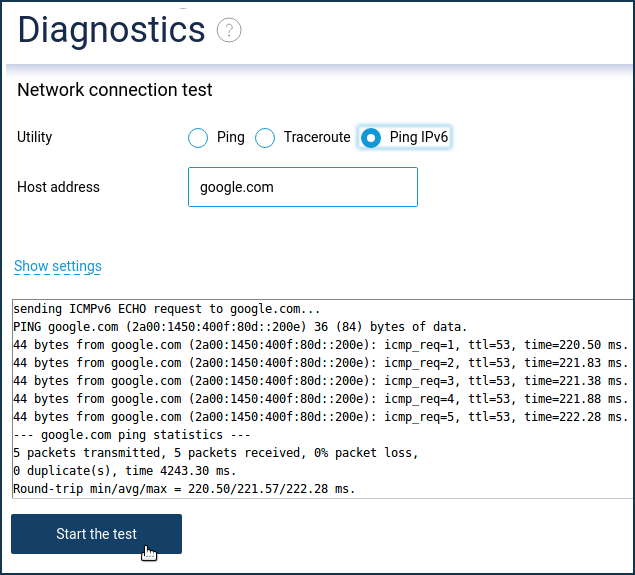
If you successfully connect to a tunnel broker, the ping results must have no packets lost (
0% packet lost). All packets must be sent (5 packets transmitted) to the host, and the host will reply (5 packets received).
Nota
Useful links:
Example of connection to an IPv6 tunnel broker from IP4Market