Router wall mounting information
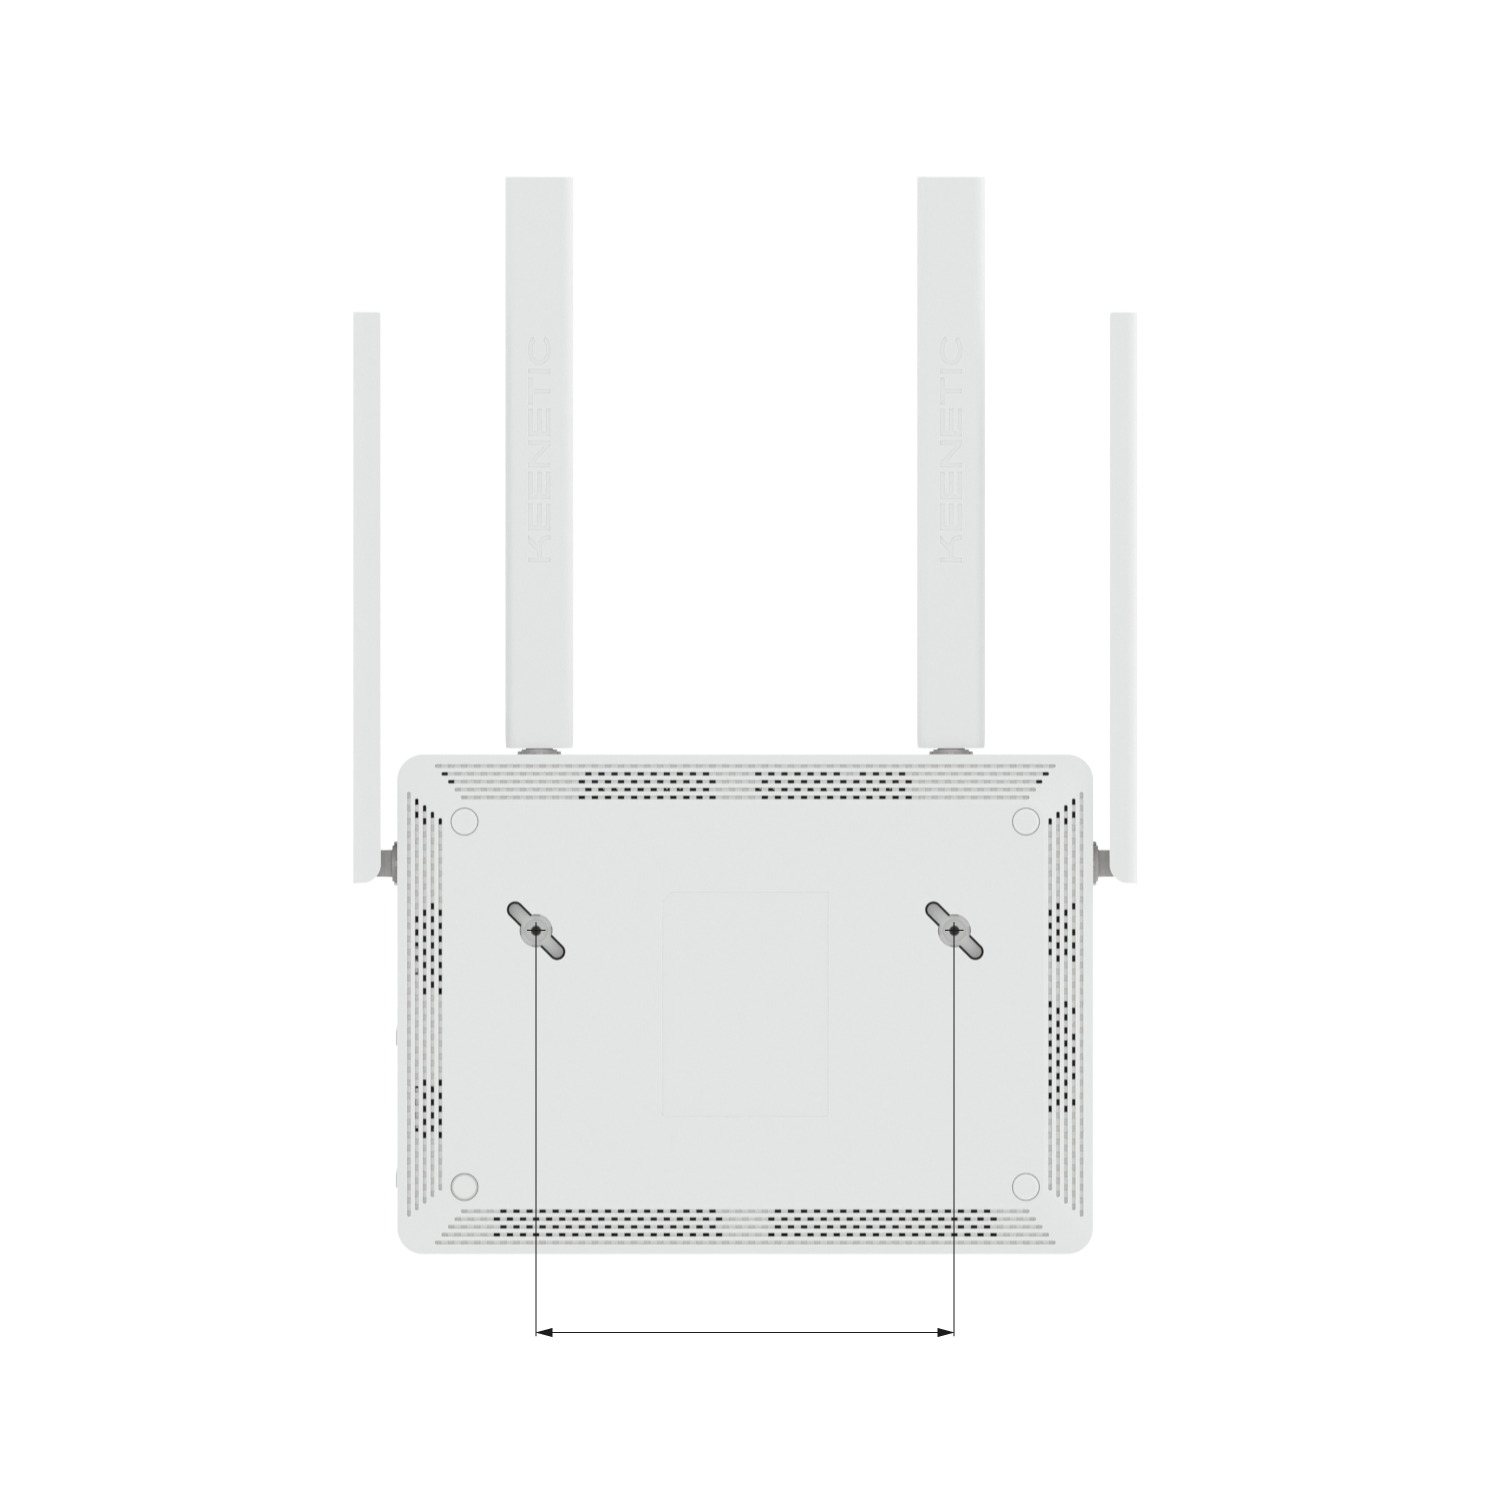
All Keenetic router models have a wall mount option. There are two holes on the back of the case.
Important
Mounting elements (self-tapping screws and wall plugs) are not included with the router.
The only exception is for the Voyager Pro (KN-3510) model, which include 2 self-tapping screws with two dowels for concrete wall and plasterboard.
Information on mounting hole spacing and screw specifications:
Model | Voyager Pro (KN-3510) |
|---|---|
Distance between holes | 82 mm |
Head diameter | 5-6 mm |
Head height | up to 1.5-2 mm |
Thread | 3 mm |
Thread length | at least 20 mm |
For example, for the larger Keenetic Hero 4G, Hopper, Sprinter, and other models:
Below is the wall mounting template (pdf format) for your Keenetic:
Note
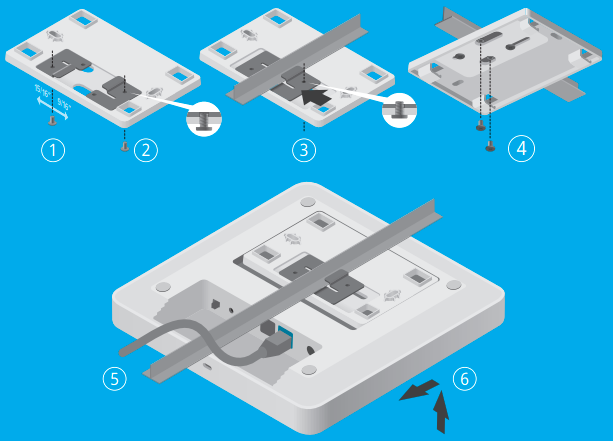
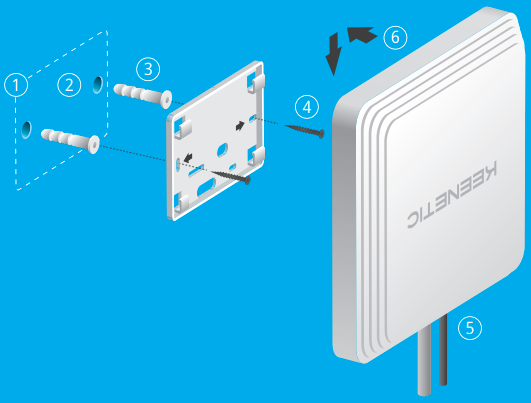
Mounting Voyager Pro (KN-3510) to wall and ceiling.
KN-3510 (Voyager Pro can be placed on a flat surface or attached to a wall or solid ceiling using the supplied mounting kit, it can also be fitted to suspended ceilings by using the mounting kit together with T-rail clips.
Mounting to a Wall or Solid Ceiling
Place the mounting bracket in the desired position. Be attentive to any existing electrical or network cabling.
Mark two screw hole positions. Drill a
6 mmdiameter hole in each of the marked spots.Insert the ribbed plastic wall plugs into the holes. Or, in the case of a drywall surface, screw the drywall anchors in with a screwdriver.
Secure the mounting bracket to the wall or ceiling by driving the self-tapping screws into the anchors.
Connect the Ethernet cable(s) and/or power adapter to the Keenetic device.
Attach the Keenetic device to the mounting bracket and move it in the direction of the arrows until it locks into place.
Mounting to a Suspended Ceiling Using T-rails
Secure the first T-rail clip to the mounting bracket with a screw. Depending on the T-rail size, use the
9/16”(14.3 mm) or15/16”(23.8 mm) position.Hook the second T-rail clip to the mounting bracket. Do not tighten the screw at this time.
Position the mounting bracket on the T-rail by placing the first T-rail clip on the rail base and pushing the second clip toward the rail base. Tighten the second screw.
Secure the mounting bracket to the T-rail with the two remaining screws.
Connect the cables to the Keenetic device.
Attach the Keenetic device to the mounting bracket and move it in the direction of the arrows until it locks into place. Adjust the cables so that the exposed parts are hidden behind the case.